LAMP Stack Ubuntu 18.04 LTS
There are many guides to setting up a LAMP stack. LAMP stands for Linux, Apache, MySQL and PHP and is the basis for many web servers. This guide will show you one method of setting up a LAMP stack.
These items can be installed using other ways such as using tasksel in Ubuntu. The method outlined will work on any flavor of Debian based operating systems such as the Raspberry Pi, Ubuntu, Mint, and of course Debian. This is not a complete guide of everything you must do for a best practices production-server, but will allow you to setup a basic LAMP stack for your home lab or hobby applications. Further hardening and security requirements should be put in place for a public-facing production server.
TLDR;
Alternatively, if you simply want to run a home/lab only website (not public facing) you can use XAMPP - but where is the fun in that?
Software Requirements
There are many “web based” applications that use a LAMP stack. WordPress is probably the most common application that uses LAMP. WordPress is a content management system used by bloggers and businesses all around the world. Whatever application you plan on running (if not WordPress), you should look at the requirements of that specific application and estimate the hardware capacity and software version you will need for your specific conditions. The wordpress official requirements are not very difficult to achieve, even with modest hardware such as a Raspberry Pi. LAMP stack meets these requirements in the software area.
We will assume that the application you are installing on your LAMP server is WordPress.
Suggested Minimum Hardware Requirements
Assuming that we are going to build this LAMP stack for a WordPress site. The next question to ask yourself would be how busy you plan on that site to be? For a modest WordPress site, a few plugins, and 50,000 visitors a month 1GB of RAM is probably going to be all you need for RAM. Ask yourself this same question for any application you might run on the LAMP server. Many LAMP servers run more than one application too. As long as the hardware can handle the extra resource load, and appropriate security measures are taken, there is nothing wrong with a configuration like this. Typically this means installing each app on a different port instead of the default https port of 443. You can help optimize your server by only running applications that are required. This helps with performance, and security.
An experienced system admin can help you estimate hardware requirements based on how much traffic your application is intended to run. RAM is relatively cheap, and having 2GB, 4GB or 8GB will allow for future growth and multiple users on your sites. All of this assumes “WordPress” as the application you want to run on your LAMP stack, but there are any number of applications that can use a LAMP stack as it’s base. That application will have server recommendation documentation and you should use those requirements.
For our purposes, you can easily host a low traffic WordPress site on hardware like the Raspberry Pi (even the zero). Virtualized LAMP stacks run fine too using only modest resources (for lab/learning/testing purposes). ESXi is free, VMWare Workstation and Virtual Box or MAC Fusion are often used as well. There are many other ways to virtualize on your own hardware, but you can also get a free LAMP stack base from AWS EC2 (free for 12 months). Other companies like Digital Ocean have $5 a month LAMP servers that will easily run small blogs and business websites.
IF you put your LAMP in a public network, you must secure it and take additional steps to protect it.
Optimizations
A final step for every application is to consider the many ways it can be optimized. Some of the common ways are:
Limited Plugins
Load Balancing
Optimized Application Code
Apache tuning
Content Cache such as W3 Total Cache, Varnish
Static Content Servers
Separate Servers for DB, and HTTPS
Separate DNS Servers like CloudFlare
All of these discussions are outside of the scope of this LAMP how to, but you need to know what questions to ask your system administrators/hosting company when planning an application.
Keep in mind, we help with this exact setup. Feel free to hire us to help you with your project.
LAMP Components
LAMP stands for Linux, Apache, MySQL and PHP. This guide will go over how to install each in their most basic configuration.
LAMP: Linux (Ubuntu 18.04 LTS)
 L in LAMP is for Linux. Ubuntu is a mature, stable, Debian based and community supported operating system. The LTS designates “Long Term Support” and it means you will get security patches for several years. As of this writing Ubuntu 18.04 LTS is the latest stable LTS release. We recommend Ubuntu because it has excellent commercial support available and is fairly simple to troubleshoot. Ubuntu is also stable and mature, which means you can depend on it. You can use RHEL (or any of it’s variants) or any other flavor of Linux you choose if you prefer RHEL, SUSE or others instead of Debian. This guide is written for Ubuntu 18.04 LTS though and commands, directory locations and other small details will differ if you choose another flavor of Linux.
The Ubuntu install wizard practically holds your hand and is almost as simple as booting the ISO/USB/Live CD and following the on screen instructions. The only question that might be confusing is how to partition the disk. You can accept all defaults (install a minimal server), and then enter a user name. There isn’t much more to installing Ubuntu Linux. The tasksel (task selection) feature may even prompt you to setup the entire LAMP stack automatically. This guide is written for a bare-bones server or net install that did not select Apache, MySQL and PHP.
One concept that may be confusing if you are new to Linux is the “sudo” command. This command allows you to run elevated privilege commands from a lower privilege account. For example if you would like to set the date, you will need to be “root” or “su” to do so. The “sudo” command allows you to temporarily gain access to the command with the proper rights to execute it. To change the date to 03-23-2020 1:10PM, you would type:
sudo /bin/date 032301102020
Another important thing to do is to “update” and “upgrade” your OS. This pulls a list of available updates and applies them. Updates often fix security flaws and bugs. To do updates on Ubuntu you should regularly run the following:
sudo apt-get update && sudo apt-get upgrade
Updating and upgrading are requirements for the next steps and should only take a few minutes at most.
IF you would like detailed instructions and screenshots on installing Linux, leave a comment below asking for it and we’ll write them for you.
LAMP: Apache 2.2
A in LAMP is for Apache. The “web server” portion can be any software that serves web pages. Apache is common, but there are variants such as NGINX too. Some ways to optimize web serving functions is to use a cache, a content delivery network, or even load balancers. For simplicity sake, we will have only one web server, and it will be Apache 2.2. Apache can be further tuned to limit persistent connections, timeout sooner, spin up more workers, reuse connections and so much more. This isn’t needed for our basic setup of a lab LAMP server.
The commands to install Apache are very straightforward and we’ll use the apt command to perform the install:
sudo apt install apache2 -y
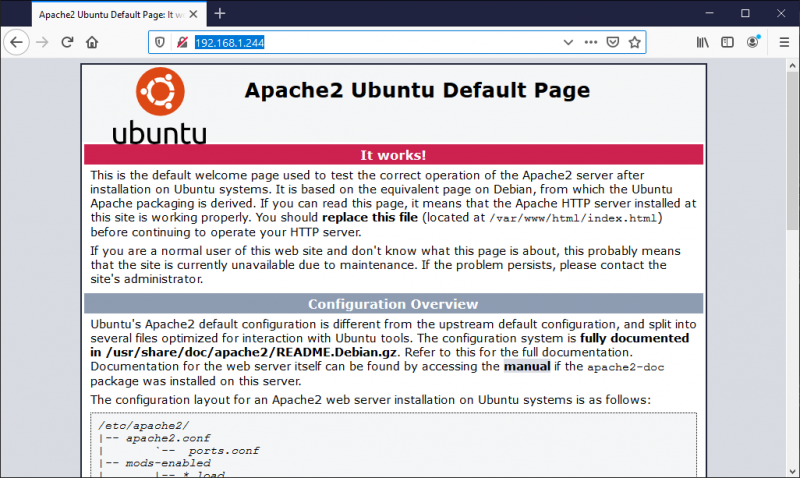
This will install the packages and put the required files in the /var/www/html/ location on your server. You can test it by going to your of your server and you will see the default page, /var/www/html/index.html in your browser (http://yourserver/).

LAMP: MySQL
 M in LAMP is for MySQL. A database can be MySQL, Oracle, Maria, PostgreSQL or any Database you choose. WordPress recommends MySQL and many applications use it, so we will cover MySQL installation. One way to optimize your server would be to run your database on another server and databases can be clustered too.
The commands to install the server and do the basic security fixup are:
sudo apt install mysql-server -y
sudo mysql_secure_installation
Suggested settings for the mysql_secure_installation are:
VALIDATE PASSWORD PLUGIN: Y
POLICY MEDIUM (or) STRONG
Remove Anonymous users: Y
Disallow root login remotely: Y
Remove test database: Y
Reload privilege table: Y
Remember the password you choose here, because you will need it later when you modify your database for any application.
LAMP: PHP
P in LAMP is for PHP. PHP is the scripting language that serves dynamic data when a page is requested. PHP 7.2 (latest stable as of this writing), is more memory efficient and secure than previous versions. PHP can be further optimized to limit what it shows, how it interacts with the security features of your OS, and how much memory it is allowed to consume. All of these are beyond the scope of this article, but know that PHP is probably the highest threat vector for an attacker.
Installing PHP requires a few things. One of the things required is a mod-php and MySQL interface. You can install the basic requirements with the following commands:
sudo apt install php libapache2-mod-php php-mysql -y
Next, you’ll need to restart apache2 for the setting to take effect:
sudo systemctl restart apache2
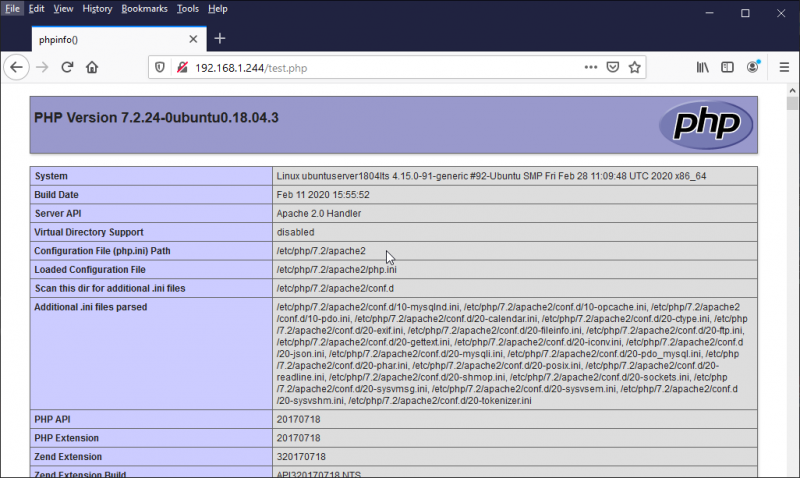
If you want to test PHP, make a simple file containing the phpinfo() function:
sudo vim /var/www/html/test.php
Open your browser and point it to http://yourserverip/test.php

You should see a bunch of PHP settings and configurations. This file is considered a security risk and should be deleted after you have tested PHP.
sudo rm -rf /var/www/html/test.php
That’s it! You now have a lab ready server running Ubuntu 18.04 LTS with MySQL for the DB and Apache with PHP as the web service.
Security Warning
There are MANY more things to do to protect your server. If you intend to serve pages to the public, you should secure your system with a firewall at the very least. Within minutes of being online, your server will be probed and attackers will start brute force guessing your administrator type logins. We recommend installing and using UFW and using a dynamically updated admin block that follows you and allows ONLY you to access SSH and other admin ports. If you are running WordPress, HTTPS is recommended, and .htaccess protection on vulnerable directories are also recommended. File permissions that are too wide could easily be exploited to bypass all of your protections and enter through PHP. This document is for lab purposes only, to help you learn about setting up a web server. It is NOT intended for production networks.
Related Articles
We recommend further reading to help with the firewall setup, and to consult experienced system admins who can help you with a more secure setup.